|
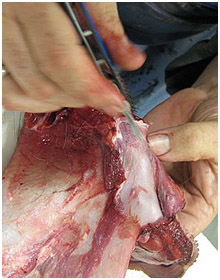
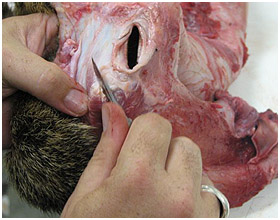
Step 1: Splitting the lips
The first step of final cape preparation is splitting the lips. This is really the opening of the lips to their outer most edges. A sharp knife or a scalpel is a must to complete this process. This must be done properly for the salt to penetrate. If you do not get the lips open slippage (hair loss) can and will occur. Start in the corner of the mouth and work your way around the upper and lower lips. When you have the entire mouth turned go back and shave off any remaining meat or fat.
|
|
Step 2: The chin
When you have the lips done to your satisfaction, move to the chin. The chin has lot of fatty flesh that must be removed. Be careful to flesh around the whisker roots.
|
  |
|
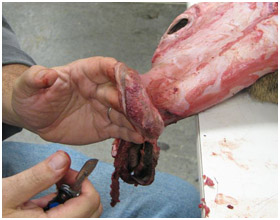
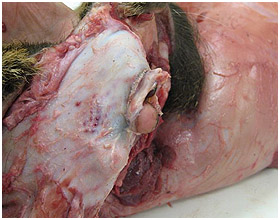
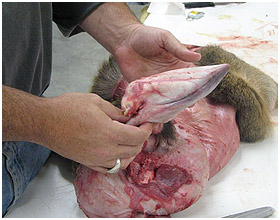
Step 3: The nose and nostrils
The nose and nostril area can be one of the most difficult to master but once you understand the anatomy it really is not that hard. The first step is to remove the septum and start fleshing around the nostrils. Try to separate the nostril skin from cartilage, the skin is very thin and it is easy to cut. Leave the nostril skin as long as possible.
When done correctly, the nostril should resemble a tube. Shave the meat of the muzzle again, be careful not to cut the whisker roots, if the roots are severed the whisker will fall out. The nose pad should be fleshed down until you see a bluish color.
|
  |
|
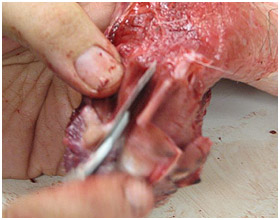
Step 4: The eyes
Start fleshing a 1-1/2" circle around the eye, then flesh all the meat and membrane off, taking special care around the tear duct or pre-orbital gland.
Flesh all the way down to the eye lids and split the lids as far as possible. This will ensure less shrinkage later in the mounting process. Be sure to leave plenty of skin to tuck.
|
|
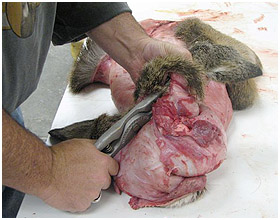
Step 5:
Now examine the cape and remove any fat, red meat or membrane from the neck, shoulders and brisket. Now you can start rubbing in some fine grain non-iodized salt into the cape; this will start the curing process while you complete the final step.
|
  |
|
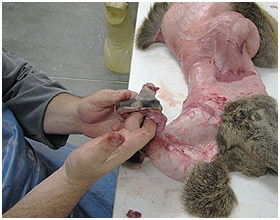
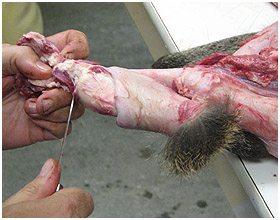
Step 6: The ears
Skin and flesh around the ear butt removing all the flesh. Now carefully start opening the ear from the back. In most cases the ear will open easily for the first 1/3rd of the ear. Now take a set of ear openers and gently start to open the ears. Great care must be taken not to rip the ears open.
Try to get within an inch of the ear edges. Remove the opener and turn the ear inside out like a sock. A wooden dowel or old paint brush handle can be inserted into the ear. Gently apply pressure and use your thumbnail to finish opening the ear to the tip.
|
 |
|
When completed, salt the ears and place the skin in position to drain. The next day shake off the old salt and re-salt with fresh.
|