|
Setting mammal eyes is relatively simple. The secret is using the same amount of clay in each eye, and the clay gun makes this easy. Start out by making sure the eye fits properly in the mannikin's eye socket. If the mannikin has positive set eyes, the angles will usually be fairly accurate. If you are using an older style form, some of the foam in the eye socket may have to be removed for the eye to fit correctly. You can easily do this by using a spade bit that is approximately the same size as the base of your eye.
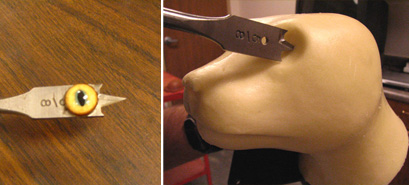 Insert the spade bit in the center of the eye socket. Estimate the correct angle (this varies according to species, and the use of reference photos is highly recommended). Start slowly and remove just enough foam to flatten out the back of the socket so that the eye fits squarely. Insert the spade bit in the center of the eye socket. Estimate the correct angle (this varies according to species, and the use of reference photos is highly recommended). Start slowly and remove just enough foam to flatten out the back of the socket so that the eye fits squarely.
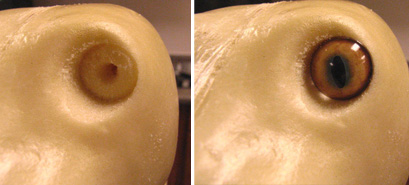 Work the bit slowly so that you don't remove too much foam from the socket. Keep trying the eye and checking the fit. Do the other socket and compare the symmetry of each eye. Work the bit slowly so that you don't remove too much foam from the socket. Keep trying the eye and checking the fit. Do the other socket and compare the symmetry of each eye.
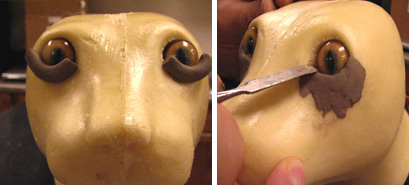
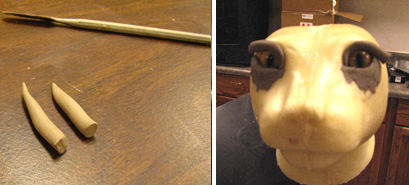
 Keep fine tuning until you are satisfied that the angle and depth of each eye is the same. You are now ready to set the eye and build the eye lids. Start out by using a small cone shaped piece of Critter Clay and pack it in to the back of each eye. Insert the eye into the socket. If the clay cone is the correct size it will mash out and hold the eye securely in place. Place a roll of clay into the clay gun and using the largest round tip squeeze out a roll of clay in a straight line. Keep fine tuning until you are satisfied that the angle and depth of each eye is the same. You are now ready to set the eye and build the eye lids. Start out by using a small cone shaped piece of Critter Clay and pack it in to the back of each eye. Insert the eye into the socket. If the clay cone is the correct size it will mash out and hold the eye securely in place. Place a roll of clay into the clay gun and using the largest round tip squeeze out a roll of clay in a straight line.
 Match the appropriate size tip to the species you are working on. If the clay seems too stiff to go through the opening it can be thinned with a small amount of water. Do not get the clay too watered down or it will be slimy and hard to work with. This roll will be used to form the upper and lower eyelids. Cut off enough clay to fit around the lower lid of the eye socket. Cut off the exact same amount for the lower lid on the opposite eye. Match the appropriate size tip to the species you are working on. If the clay seems too stiff to go through the opening it can be thinned with a small amount of water. Do not get the clay too watered down or it will be slimy and hard to work with. This roll will be used to form the upper and lower eyelids. Cut off enough clay to fit around the lower lid of the eye socket. Cut off the exact same amount for the lower lid on the opposite eye.
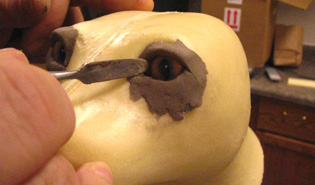
 Using a modeling tool blend each roll into the lower side of each eye. Check your reference frequently. You are now ready to form the upper lids. Cut off enough clay to go around the upper half of the eye and use the same amount for the opposite eye. Taper one end of each roll by twirling it between your thumb and forefinger. Using a modeling tool blend each roll into the lower side of each eye. Check your reference frequently. You are now ready to form the upper lids. Cut off enough clay to go around the upper half of the eye and use the same amount for the opposite eye. Taper one end of each roll by twirling it between your thumb and forefinger.
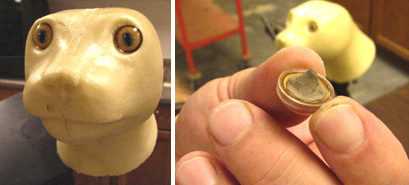
 Keep the same size and shape. This tapered end will be the front part of the upper lid. Place this roll around the upper half of the eye socket and blend to the form and the glass eye again checking your reference. Keep the same size and shape. This tapered end will be the front part of the upper lid. Place this roll around the upper half of the eye socket and blend to the form and the glass eye again checking your reference.
 You now have two very symmetrical eyes in a very short amount of time. You now have two very symmetrical eyes in a very short amount of time.
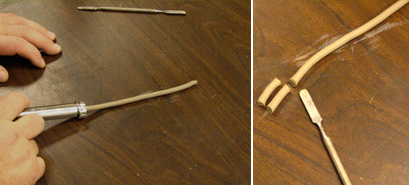
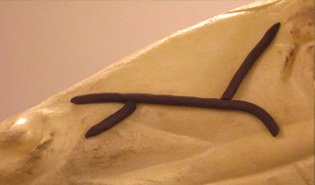 Here is another useful tip for the clay gun. Using Apoxie Sculpt or Apoxie Clay (pictured) thinned slightly with Apoxie Super Safety Solvent, you can add vein detail to some of your shorter hair mounts. Squeeze equal amounts out of the clay gun and place on the form in the desired locations. Let dry completely before mounting. Clean the clay gun immediately with Van Clean. Here is another useful tip for the clay gun. Using Apoxie Sculpt or Apoxie Clay (pictured) thinned slightly with Apoxie Super Safety Solvent, you can add vein detail to some of your shorter hair mounts. Squeeze equal amounts out of the clay gun and place on the form in the desired locations. Let dry completely before mounting. Clean the clay gun immediately with Van Clean.
The following is a list of products that we recommend:
|